Recipe: sourdough starter
Have you always wanted to make your own sourdough starter, but don't know where to start? We have a super easy step-by-step plan for you that will help you make your own sourdough starter in a week. Once you make your sourdough starter, you can store it in the fridge and use it over and over again to bake sourdough bread. Pssst, they even say the starter works even better if you name it in advance.
Kitchenware
- large pot/bowl
- 1 or 2 small potsto keep the leaven in
- (wooden) spoon/silicone spatula
- tea towel
- kitchen scales
Ingredients
- 385 g organic rye flour
- 385 ml lukewarm water, important: never more than 40°C
Instructions
- Day 1: Put 110 g of flour and 110 ml of lukewarm water in a large pot or bowl and stir well. Cover with a tea towel and put in a warm place. After 12 hours, briefly stir the dough.
- Day 2: after another 12 hours on, add 55 g of flour and 55 ml of lukewarm water and stir well. Put the tea towel over it again and put it in a warm place. This time let the sourdough stand for 24 hours. If all goes well, it will now start to smell a little sour (vinegary).
- Day 3: Now add 55 g of flour and 55 ml of lukewarm water to the dough again and stir well. Put the tea towel over it and put it in a warm place. Stir the sourdough again after 12 hours.
- Day 4: Again 12 hours later, add 55g flour and 55ml lukewarm water and stir well. Put the tea towel over it again and put it in a warm place. Let the sourdough stand for 24 hours.
- Day 5: Now add 55 g of flour and 55 ml of lukewarm water to the dough again and stir well. Put the tea towel over it and put it in a warm place. Stir the sourdough again after 12 hours.
- Day 6: Again 12 hours later, add 55g flour and 55ml lukewarm water and stir well. Put the tea towel over it again and put it in a warm place. Let the sourdough stand for 24 hours.
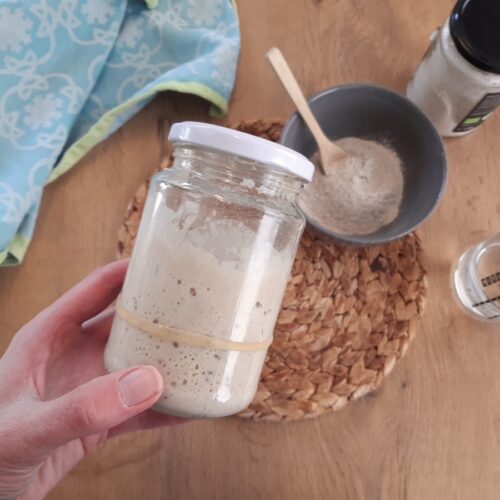
- Day 7: the sourdough is ready and can be used to bake bread! If all goes well, it smells pleasantly sour and (small) bladders have formed. If you don't see bubbles yet, you could repeat the steps of days 5 and 6 until you do see bubbles.
Notes
- Put the sourdough in a warm place. A good temperature is between 25°C and 40°C, with the ideal temperature being between 30°C and 35°C. You can put the sourdough on the heater, for example. The colder it is, the longer it will take for the sourdough to be ready.
- Sometimes a thin crust will appear on the sourdough. This is not a problem and you can just stir it in.
- At the end of the step-by-step process, the consistency of the sourdough starter should be about the same as waffle batter. It tends to be a bit thicker during the first few days.
- Make sure the items, which you use to make your sourdough, are thoroughly clean. It is best to rinse them with boiling water beforehand.
- It is recommended not to let your sourdough starter come into contact with stainless steel. I thought this was a myth and once made the sourdough starter in my food processor from stainless steel, but then my starter smelt of turpentine in no time and I unfortunately had to throw it away.
- Before baking bread, remove a few more tablespoons of the sourdough starter and put it in a small (glass) jar. Keep this jar in the fridge and feed your sourdough starter once a week. You do this by putting a large tablespoon (12 grams) of the sourdough starter into a new jar, then add 60 grams of rye flour and 60 grams of water. Stir well and then put it back in the fridge. Put the lid loosely on the jar so that the jar does not break if bubbles form. If you are as forgetful as me, put two jars of sourdough starter in the fridge. Then you'll have a spare jar for when you forget to put a jar of sourdough starter in the fridge for next time while baking bread.
- When you first bake bread with your sourdough starter, it is usually not very strong yet and the dough does not rise very well. This gets better when the sourdough is older. You might also want to add some yeast (10 to 20 grams) the first few times you bake bread.