
Everyone with a baby knows it: before you know it, you can barely get the snaps at the bottom of the romper to close and it seems time for new rompers. But wait a while before you run to the (second-hand) shop! We have a super handy hack: a romper extender that makes rompers fit a lot longer. In this article, we tell you all about romper extenders and how to easily make one yourself.
What is a romper extender?
A romper extender is best known among parents who use washable nappies. A shame, because romper extenders come in handy even if you don't use washable nappies. What is it exactly? The name says it all: a romper extender extends the romper. It is a small piece of fabric with snaps at both ends, which you attach between the snaps at the bottom of the romper. This way, the bodysuit fits longer and you don't have to buy new bodysuits as often. So it's very sustainable!
Where can you find romper extenders?
You can buy ready-made romper extenders buy, but you can just as easily make them yourself from old rompers. So don't throw away the onesie that is too small and has holes or stains - the press-studs at the bottom may come in handy. Note that not all snaps are the same size. Most snaps on bodysuits are 5 mm, 7 mm or 9 mm. If you have bodysuits of different brands, chances are you will need several bodysuit extenders. Fortunately, you can make your own in no time with our handy step-by-step plan!


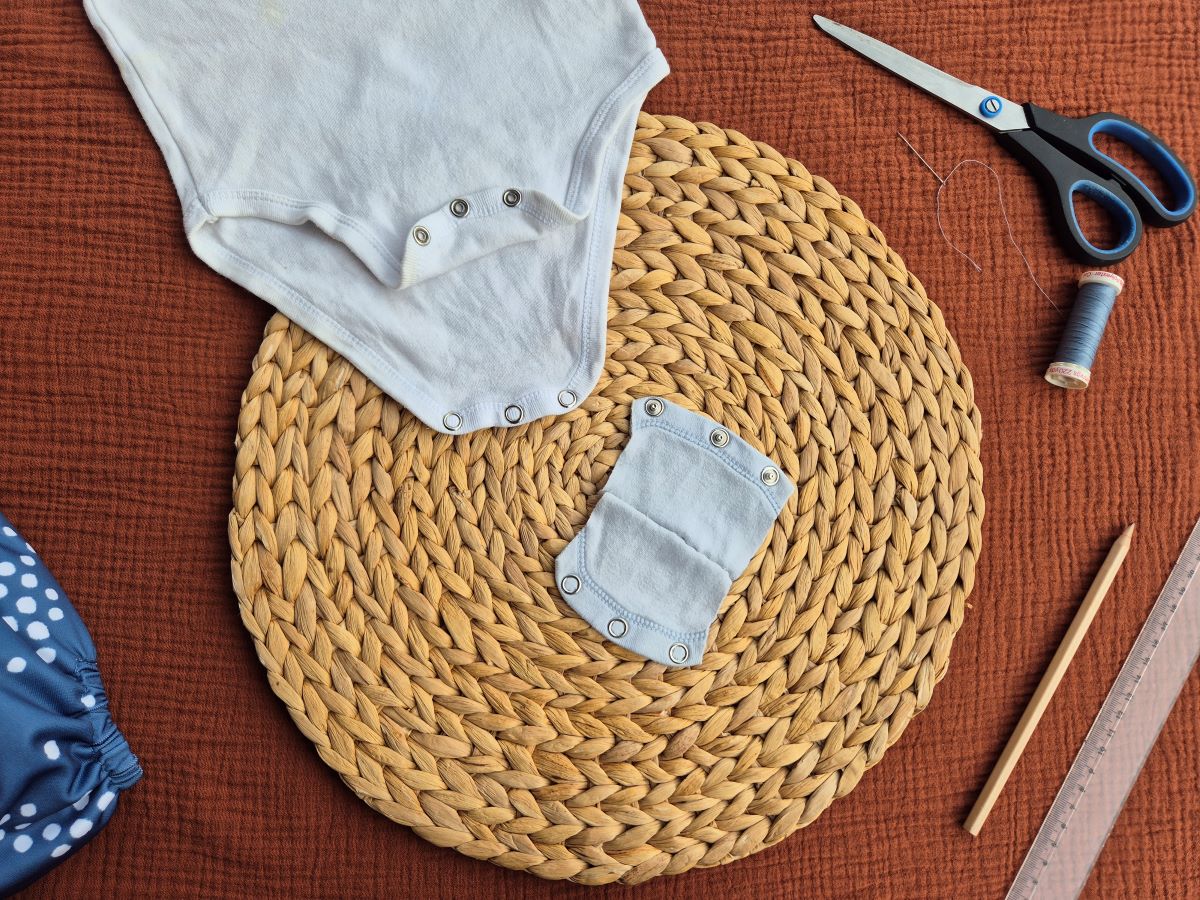
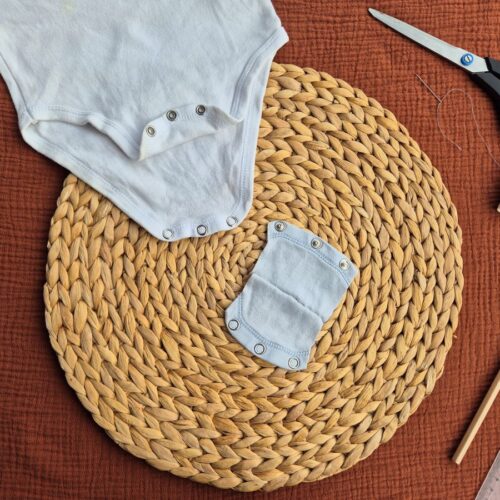
Steps 2, 3, 4 and the final result.
DIY romper extender: this is how bodysuits fit much longer
Requirements
- old romper(make sure the snaps are the same size as those of the bodysuit you want to use the bodysuit extender for)
- ruler or tape measure
- (fabric) scissors
- pencil or erasable pen
- needle and thread
Instructions
- Undo the buttons at the bottom of the romper.
- On the front of the romper - around the press-studs - cut a piece of fabric about 9 cm wide and 6 cm long. The press-studs are at the bottom edge in the middle (see photo). It is useful to mark this with a pencil or erasable pen before cutting.
- Do the same for the back of the romper. This is easier if you briefly reattach the front piece with the snaps.
- Place the two pieces of fabric on top of each other, overlapping by about 1 cm. Make sure the snaps are on the outside and fit on the romper (see photo).
- Sew the pieces of fabric together. We just did this by hand, but if you have a sewing machine, you can of course do it too.
More sustainable tips from thegreenlist.nl
- Do you use washable nappies with inserts? Then you'll probably also find this DIY for inserts very useful.
- Sustainable baby gear: What do you really need for your little one (and what can be done second-hand)?
- When you have a baby, a lot of baby wipes and nose wipes go through. Did you know that you can also very easily make them yourself from old fabric scraps? Check out our DIY for wet wipes here.
Photo credits: Kirsten Schoner.