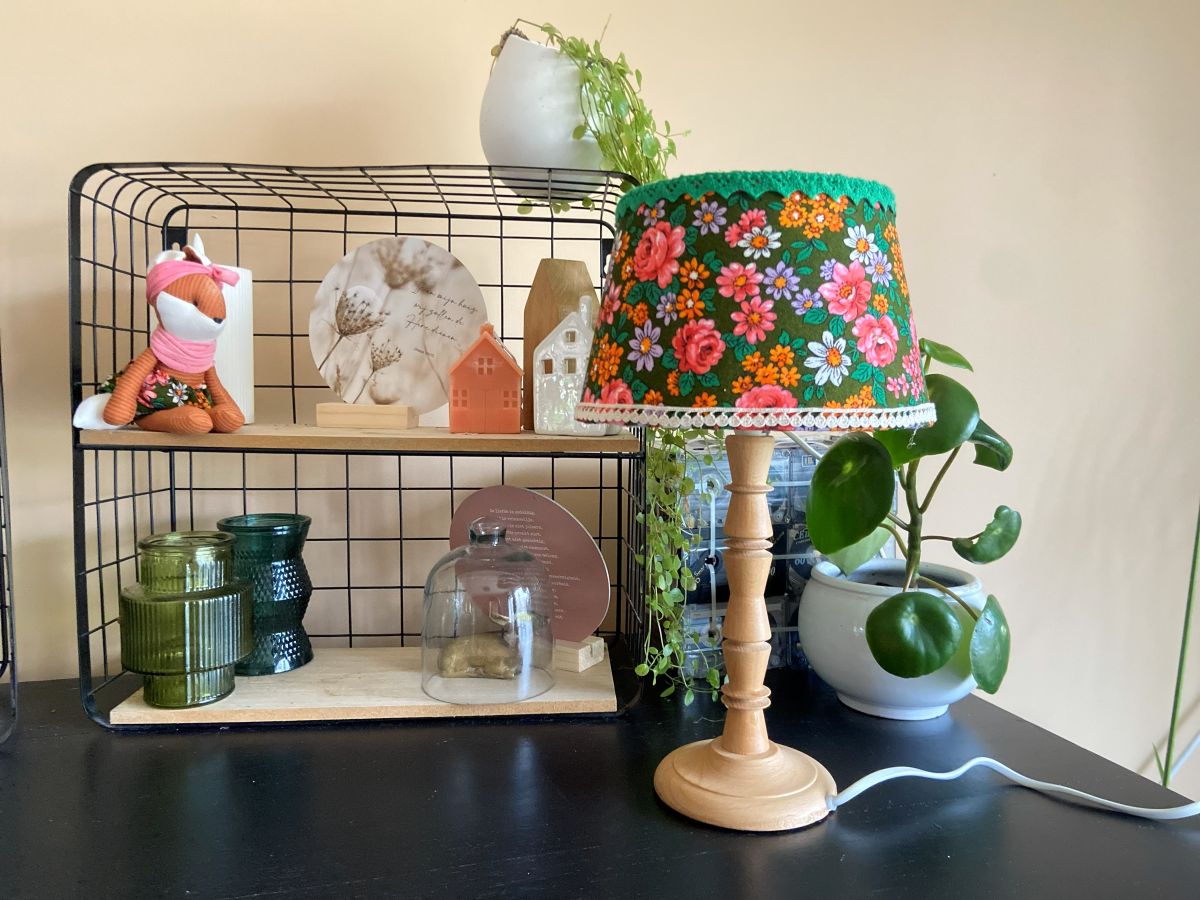

Do you have an old lampshade at home that no longer matches with your interior or your taste? Or, even better, you spot a lampshade in a second-hand shop with a nice shape but a rather dated or discoloured shade. Then pay close attention. Because our DIY expert Melanie shows you step-by-step how to re-cover such an old lampshade and make it completely up-to-date.
Upcycling a vintage lampshade from the charity shop!
At thegreenlist.nl we are fans of reusing. And what we find even more fun is if you give something old a fresh, new look by upcycling it. A lamp is perfect for this. Such an item is often quite prominent in your interior and can be quite expensive when new. In short, the ideal piece of furniture to give a second life by reupholstering the lampshade. Or, perhaps even more fun, by finding an old lampshade at a charity shop and covering it yourself with fabric that you're really happy with. This way, a charity shop lamp suddenly becomes a real eye-catcher. And an extra bonus: even for a beginner upcycler, this DIY is very doable.


With a piece of fabric and some fabric glue or Craft glue in a jiffy you can transform an old lampshade into a fresh, new one.
Recovering an old lampshade: step by step
Requirements
- lampshade
- large sheet of paper
- pencil
- scissors
- pins
- glueglue fabric glue or Craft glue
- Optional: a piece of lace or fringe
Instructions
To make a pattern or mould
- Use a large piece of paper to make a template. We taped 2 A3 sheets together, but A4 sheets, a newspaper, or flyers work too. Check if the paper is big enough by wrapping it around the lampshade.
- Position the vertical seam of the lampshade in the middle of your paper. Using a pencil, mark the point on the shade that is directly opposite this seam. Slowly roll the lampshade over the paper, keeping the pencil against the top edge. Draw the top edge in this way up to your mark and a little beyond.
- Repeat this for the bottom edge. Make sure to roll the cap along the line you just drew.
- You have now drawn half of the lampshade. Fold the paper in half and cut along the line. Wrap the template around the lampshade to check if it fits and make any necessary adjustments.
Lampshade covering
- Lay the template on the back of the fabric you wish to use. Ensure the fabric is well-ironed. Pin in place and cut out approximately 1.5 to 2 cm seam allowance all around.
- Start applying glue at the seam. Always apply glue to a section of about 10 to 15 cm. Use a brush, badger brush, or sponge to spread the glue evenly. Stick the fabric down and rub out any wrinkles. Continue this section by section, and keep checking that the seam allowance above and below remains the same.
- Once you have a full circle, you'll have a small piece of fabric left over. Fold approximately 1 cm of this over to create a seam, secure it, and neatly glue it onto the lampshade.
- Trim the seam allowance to approximately 1 cm all around. Make small snips into the fabric every 2 to 3 cm.
- Now stick the edges inwards, bit by bit again.
- Gently push the dusty edges inwards with the tip of a pair of scissors, as if around the ring. Be careful not to pierce through the cap.
- Optional: decorate the lampshade with ribbons, lace or fringe from a charity shop.
More upcycling tips from thegreenlist.nl
- Another fun DIY: Dyeing your own clothes with natural fabric dyes.
- Old jeans? Make it a kek bag!
- Something else nice with fabric: Zero waste slingers worden gemaakt van restmateriaal.
Photo credtis: Melanie de Oliveira.