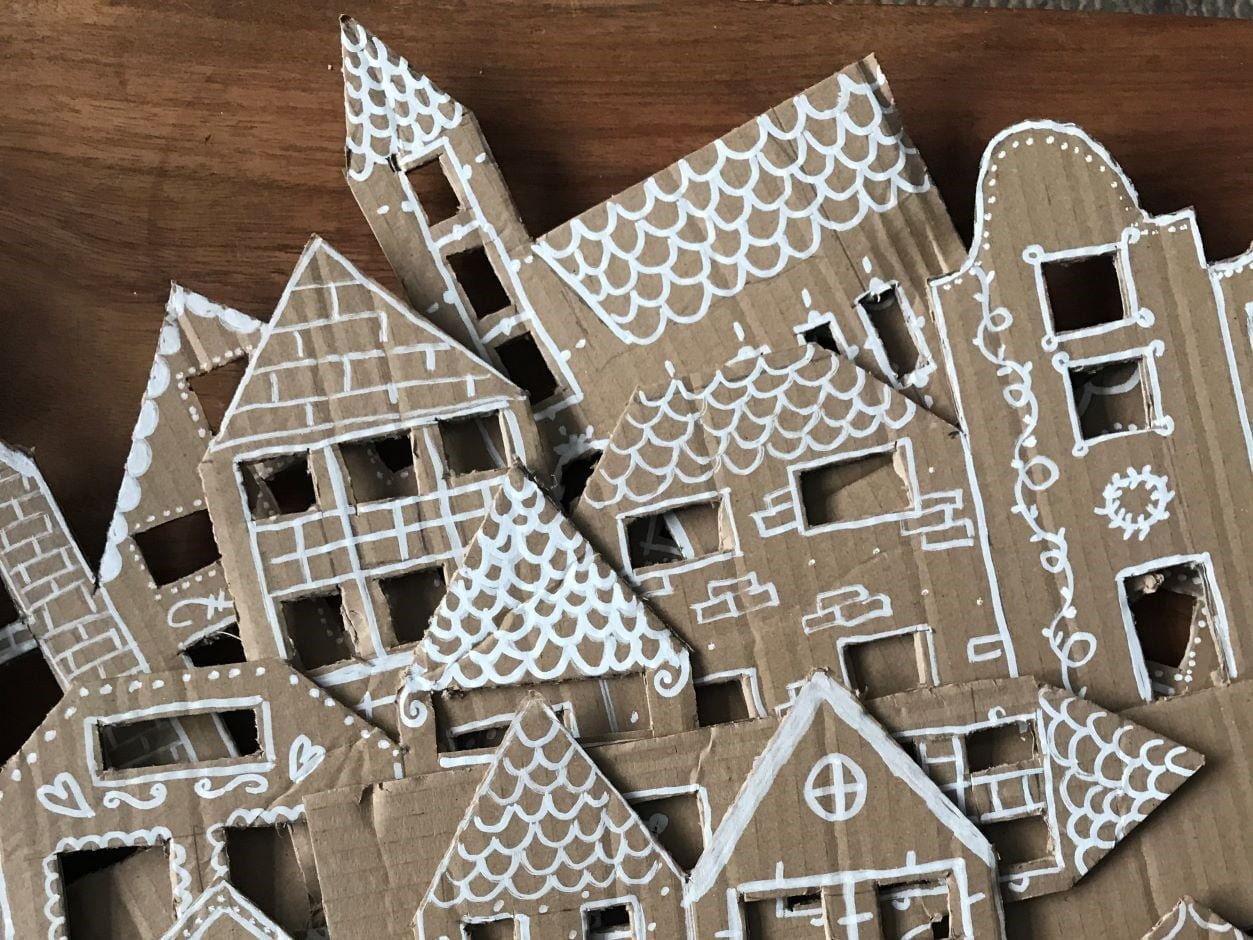
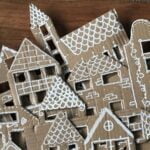
Crafting with leftover materials is not dull, it's great! We like to show you that with this cosy Winter do-it-yourself: Dutch houses made of old cardboard. Easy to make, free and unique, because nowhere else on sale! These houses prove that you need very little to put your house in the Christmas spirit. This is how to make this DIY Christmas craft!
DIY Christmas: crafting with old cardboard
The shops are once again full of cosy Christmas decorations that you can use to dress up your home, but of course, all those items that you only use for a few weeks a year are not that sustainable. They are often made of cheap materials and, moreover, it takes a lot of energy and raw materials to make things and get them here. This can be done differently, without sacrificing Christmas cheer. Because it is even more fun and sustainable if you make your own Christmas decorations, like this cosy window decoration from old cardboard. This crafting tip is very accessible and easy to do with children. And that also makes it an instant tip for the Christmas holidays!


Collect, measure, draw, cut, colour and you're done with your cardboard houses. Tip: Need inspiration for your cottages? Do a search on Pinterest for ‘gingerbread houses’.
Christmas craft: Dutch houses made of old cardboard
Tools
- cardboard box
- pencil (and eraser)
- (metal) ruler
- cutting mat
- Stanley knife or hobby knife
- white marker
- optional painter's tape or double-sided tape
Instructions
- Measure the width of the windows.
- Cut pieces of cardboard to fit between the window frames. Tip: it doesn't have to be from 1 piece of cardboard, you can feel free to make it from several pieces.
- Using the ruler, draw shapes of houses on the cardboard. Take the width of the window frames into account if necessary. For example, I left a seven-centimetre border empty at the bottom so that they could stand on the windowsill, and I could clip them behind the curtains. Tip: make the houses of different widths and heights.
- Cut out the houses. Use your cutting mat and ruler. If you don't have them, you could also do it with good scissors.
- Then use your pencil and ruler to draw doors and houses. Again, in different sizes.
- Cut out the windows and doors.
- Decorate the edges of the roofs and windows and doors with the white (posca) marker. Tip: vary with curves, dots, dashes, draw roof tiles, stones, snow edges, hearts, etc. Search “gingerbread houses” on Pinterest, for example, for inspiration.
- Place the houses behind your windows. You can secure them with some double-sided tape or pieces of painter's tape. (In my case, they are stuck between the window frame and the curtain). Tip: use a light string behind the houses for extra atmosphere!
Fun Christmas DIY during the Christmas holidays
Everyone has a cardboard box, ruler, pencil and knife at home. And a white marker is also easy to come by. This DIY is so simple that it is also a fun activity to do with (grand)children, for instance during the Christmas holidays. You could also paint the houses, add little trees, Saint & Pete, Father Christmas. In short, you can turn them into a whole Christmas village.
More zero waste crafting tips from thegreenlist.nl
- Also see: zero waste packing tips for the holidays.
- Also see: DIY Christmas baubles painting.
- Also see: Making fun DIY advent calendar.
- Also see: DIY zero waste sustainable Christmas table.
Photo credits: Melanie de Oliveira.