Earlier we wrote an article about candles, because candles - however cosy - are also far from being good for the environment. One of the tips then was to make candles yourself and so we asked our DIY expert Melanie if she could show us how to do it. With a sustainable twist, of course, that's how we roll! Burning candles almost always leaves leftovers. Fortunately, you can very easily reuse them to make new candles.
Making candles from candle scraps
However cosy, a candle is still a disposable product. And earlier we learned that candles are often made of substances containing petroleum. So if you burn a candle, you contribute a little to global warming. Fortunately, more and more artisan candles are on sale with better ingredients such as soy, beeswax and rapeseed wax, but eventually that beautiful candle will burn out. So a sustainable tip is to enjoy that beautiful candle for as long as possible. And you can do that much longer than you think. Because those leftovers that we normally throw away can together form a beautiful candle. A candle you will make!


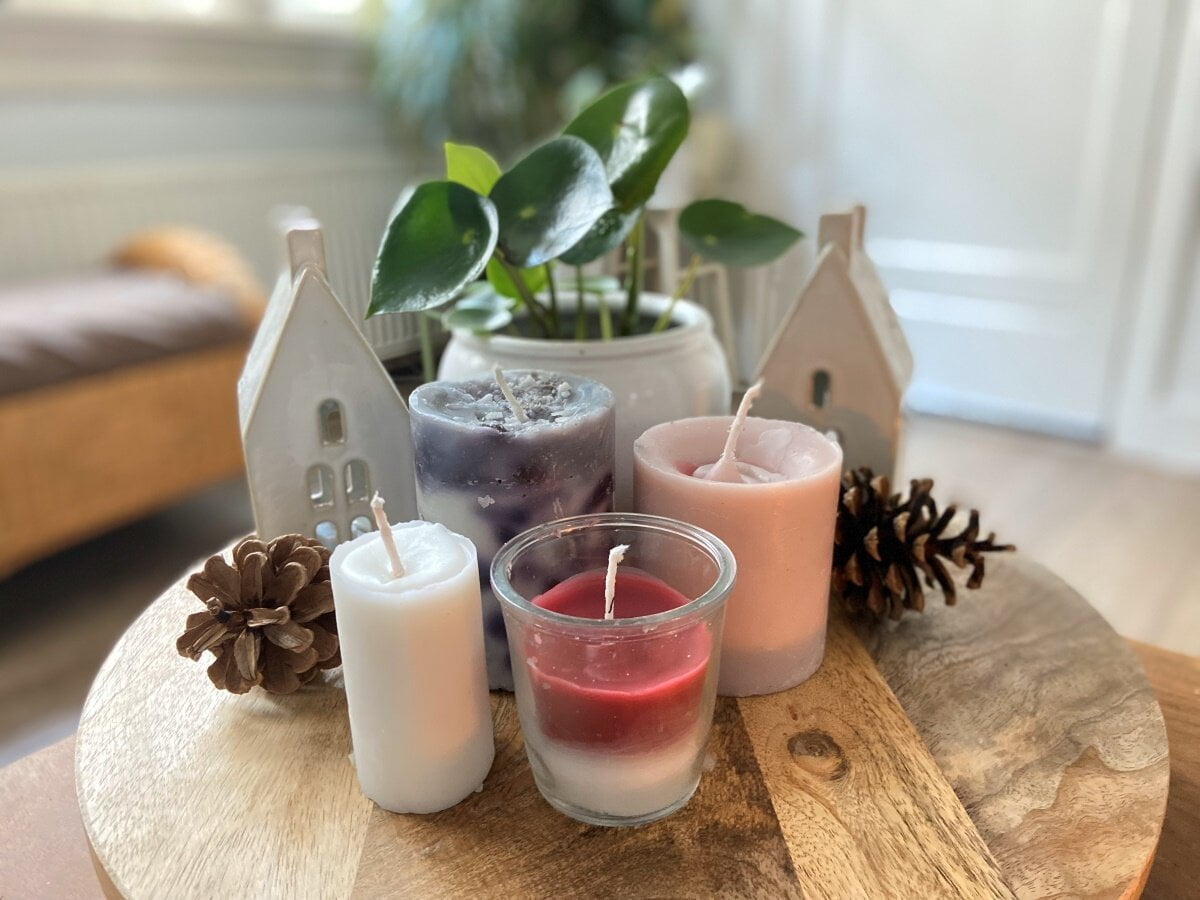
The different steps in the picture to make new candles from candle scraps. If you mix several colours of candle scraps, you also get a cool effect.

Zero waste tip: making candles from old candles
Tools
- candle wick: you can buy this by the metre, but you can also get loose wicks with a wax coating
- leftover candles
- moulds: silicone cupcake moulds, empty toilet roll, empty juice or milk carton or an empty crisp canister also make very good moulds or use a nice vintage cup, for example
- empty glass or tin to melt the wax in
- pan
- old knife
- skewers or clothes pegs
- optional: essential (essential) oil
Instructions
- Cut leftover candle into small pieces. Remove leftover old wick.
- Melt the leftover candle au bain-marie. I used a glass jar in which I put the leftover candle, put it in a pan with a layer of water. Bring the water to the boil and then turn it on medium-high. You can add some drops of essential oil if you want.
- Make sure your mould is thoroughly clean. I used a toilet roll. With painter's tape, I taped the bottom tightly to prevent the melted wax from seeping through.
- If you have a wick without a layer of wax, briefly run the wick through the melted wax. This will keep the wick a bit firm and make it easier to keep it in place.
- Place the wick in the centre of your mould. To keep the wick in place, you can clamp it between a clothes peg, or between two skewers or hashis (chopsticks).
- To start, pour a small layer of melted wax into the mould. This helps to keep the wick in place at the bottom as well. You can use a skewer to move the wick slightly if necessary.
- Continue pouring the wax into the mould. Make sure you leave a little bit of wax, we will need it later.
- If using empty container or toilet roll: make sure your candle is completely cooled and solidified before removing it from the mould. You can tear off the cardboard in no time.
- When the candle has completely solidified, you will see that the candle gets a kind of hollow in the middle. You can solve this by filling the hole with some leftover melted wax.
Variations for your DIY candle
- If you want to make coloured layers in your candle, make sure the first layer is well solidified before pouring the next layer over it. You can make as many layers as you like!
- Fill your mould with pieces of cut candle, i.e. without melting them. Then fill the mould with melted wax. You get the best effect if you use contrasting colours for this. I used black pieces of candle, poured white candle wax over them and topped with a grey layer.
- If you prefer not to use standard candles, you can also make candles from soy, rapeseed or beeswax. These are nice sustainable alternatives.
- Got the hang of it? There are also very nice silicone casts available to make beautiful candles. Great gift idea for your wish list!
More sustainable DIY tips from thegreenlist.nl
- Old jeans? Make it a kek bag!
- Dust left over? Make the cutest zero waste garlands.
- Old t-shirt? Make a DIY plant pendant.
Photo credits: Melanie de Oliveira.