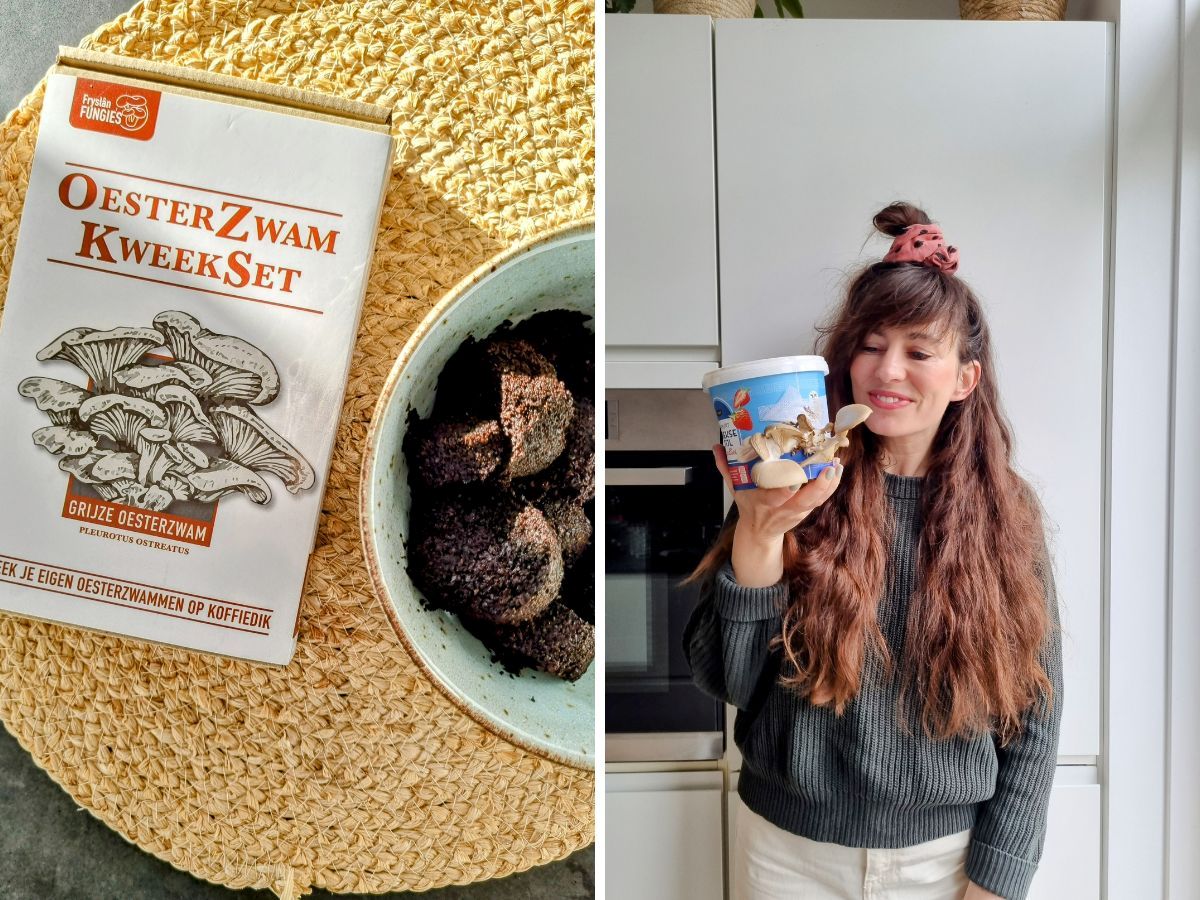

We were already fans of the ready-made grow kit from Fryslân Fungies. We really think it is a top gift. But at least as much fun is to try their oyster mushroom growing kit. With this kit, you get all the tools to build your own grow kit. The only thing you need to buy yourself is a (yoghurt) bucket. More do-it-yourself won't be.
Growing your own oyster mushrooms with coffee grounds
In cooperation with Fryslân Fungies
At Fryslân Fungies they cannot get over the fact that something as valuable as coffee grounds disappears en masse into so many dustbins, when it is a perfect breeding ground to grow food on. Coffee grounds are extremely fertile and oyster mushroom spawn love them. One plus one is two, they thought at Fryslân Fungies, and so they started developing grow kits that allow people to grow their own oyster mushrooms from their coffee grounds on their kitchen counter at home (used coffee filters and senseo pads can also be used, an oyster mushroom likes everything). It is a mega fun and meaningful activity to do. A bit like feeding your fish every day, but animal-friendly. You have grow kits with a bucket, which we have already reviewed. This time we are going to do something different, namely the grow kit. For this, you need to have your own bucket. Even more do-it-yourself so!
Double sustainable those oyster mushrooms
Growing those oyster mushrooms yourself on coffee grounds is of course already a great sustainable and circular idea, but it is even more sustainable when you consider that those oyster mushrooms are blissful meat substitutes. Have you tasted them yet? If not, go do it soon, because you won't know what you taste! This big mushroom is big, meaty and very flavourful, which makes it a perfect meat substitute. And very Dutch, because together with the mushroom, the oyster mushroom is abundant here and can be found practically all year round. Should you come across it in the supermarket: it is a good sustainable choice on your plate.
Need recipe inspiration? Then check out these vegan oyster mushrooms in beer batter agree whether these vegan pearl barley risotto from Flevoland with oyster mushrooms.


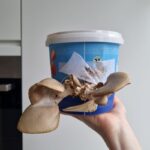
Roadmap in pictures: this is how to make your own oyster mushroom grow kit with your own bucket. I had had my grow kit for a bit longer, which you can see from the spawn. It looks slightly different from fresh spawn, but according to the experts at Fryslân Fungies, it would still work just as well. Want to store spawn like me? Then put it in the fridge.
How exactly does it work: growing your own oyster mushrooms
You can think of the bag of oyster mushroom spawn found in your kit as the seed for oyster mushrooms. The bag thus contains the oyster mushroom's fungal spores. When the spawn is mixed with a suitable growth medium, such as coffee grounds, the fungus begins to develop and forms the characteristic mushrooms we know as oyster mushrooms. Meanwhile, while you sit patiently waiting and enjoying another cup of coffee, something magical is happening in that bucket: a network of fungal threads is forming what you call mycelium. If you see white clouds on your coffee grounds after a week, you know the miracle has happened.
Your oyster mushroom's archrival
The big enemy of the oyster mushroom is green mould. It is possible that it will also grow in your grow kit, but usually the oyster mushroom will grow over it. I myself had it in my grow kit once, this had no effect on the result. The oyster mushrooms still came. If you see the green mould well, you can carefully remove it with a spoon and mist the contents well again, as mushrooms love moisture.
Grow your own oyster mushrooms with your homemade grow kit
Tools
- Oyster mushroom growing kit from Fryslân Fungies(I have breading for grey oyster mushrooms.)
- empty yoghurt bucket(Or another bucket that is not transparent, as oyster mushrooms grow towards the light.)
- kettle
- scissors or stanley knife
- 150g fresh coffee grounds or used filter coffee or Senseo pods
Instructions
Prepare breeding bucket
- Start on a day when you have a good load of fresh coffee grounds. Senseo pads and filters are also allowed in, the fungus eats it all.
- Wash the bucket thoroughly and, meanwhile, boil water in the kettle.
- Because you don't want to give other fungi a chance: rinse the inside of the bucket well with boiling water. This will make the environment sterile.
- Make 2 holes of about 1.5 cm diameter in the bucket. If your bucket is larger than 1.5 litres, make 4 holes. Make the holes with scissors or a Stanley knife. It's best to poke a hole first and then cut or slice it more easily.
- To be sure, I rinsed the inside of the bucket with boiling water afterwards, as I had touched the bucket in quite a few places again.
- Then tape the holes with the tape provided. Alternative: you can also use paint tape. Through these holes the oyster mushrooms get oxygen and later they will grow into this.
Grow kit preparation
- Wash your hands and loosen the grains of spawn in the bucket.
- Mix the spawn with 100 to 150 g of fresh coffee grounds.
- Moulds love moisture. You can recognise the right moisture content of the mixture by its dark brown chocolate-like colour. If necessary, add some water until it has the colour of dark chocolate. Tip: be careful when adding water, before you know it, it will leak out through those taped holes again. I had that, not smart.
- Put the lid on your bucket and let it rest at room temperature for a week.
- I understand your curiosity, but leave the bucket closed as much as possible. That way the environment remains sterile. If you still can't resist looking now and then, no disaster either. I did the same the first time out of curiosity and still got beautiful fungi.
Replenish, harvest & start again
- After a week (if all goes well), a down layer will have formed in the bucket. That is the time to add fresh coffee grounds again. Do this every week until the bucket is full. Tip: don't wait too long to top it up. Otherwise, the oyster mushroom may already start ‘fruiting’ in the bucket and you don't want that.
- After a few weeks (but I have also sometimes experienced that it took 3 months), oyster mushrooms emerge from the holes. They break through on their own, you don't need to do anything for this. Stay away from the tape! The oyster mushrooms will mature within 4-5 days and then dry out very quickly. Tip: keep the oyster mushrooms moist by misting them several times a day with the supplied spray bottle or a plant sprayer. And make sure to eat the oyster mushrooms immediately on day 4-6, when they are at their tastiest.
- Don't they come? Then you can lend a hand by misting the holes; they love moisture and daylight. Putting the pot outside in the cold overnight can also help (a tip only in the cold months).
- Have they hatched? Put some fresh coffee grounds in the bucket again (remove a layer with a spoon if necessary). Put new (painter's) tape on the holes and put the lid back on. You might just end up with a second (and maybe third) crop. Meanwhile, keep misting the taped holes!
- Don't they come back? Buy new spawn, clean the bucket and start again at step 1 (sterilise bucket).
Growing your own oyster mushrooms: succeeded?
Cliffhanger! Having had several successful harvests with the ready-made grow kit, it was waiting to see if the fungies would also want to grow in my homemade grow kit. And they did! Within three weeks, I could welcome the first fungi! Have you become enthusiastic about Fryslân Fungies and want to give it a try? We understand, it is a great fun activity and a nice gift to give and get. View all products in the webshop (also fun: golden and pink fungi, but those are so slightly more difficult to grow) and with the code GREENLIST10 you also get 10% discount. Grow-se!
More sustainable tips from thegreenlist.nl
- Also see: no waste! This is how you preserve ingredients for longer.
- Also see: the best fridge layout to keep your food fresh.
- Also see: cooking with leftovers: this is what you make with them!
Photo credits: thegreenlist.nl.